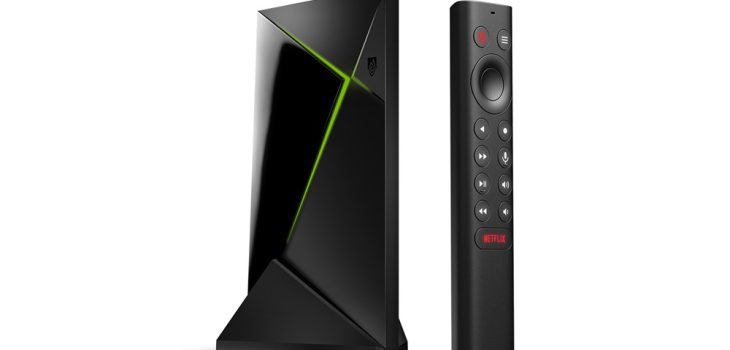
Downgrade NVIDIA Shield TV (Pro) 2019 to v8.2.3 (full)
This page contains a complete guide in 12 steps for downgrading your NVIDIA Shield TV (Pro) 2019 back to NVIDIA Shield OS v8.2.3 (Android TV Version 9, build of april 2021).
Welcome!
If you read this, you probably also got sick and tired of (unwanted) updates and thos unacceptable ads on the top of your home screen….
Downgrade to v8.2.3 in 12 steps (updated april 2023)
- Hardware check
- Preparation, download files and unpack folders
- Connecting cables
- Enable developer mode & USB-debugging
- Open command prompt and navigate to adb.exe
- USB Connection check
- Load fastboot mode
- OEM unlock
- Flash images
- OEM lock
- Reboot
- Disable auto-updates and upgrades
Skip the blablabla ->
[ Update: After 1 year (april 3rd, 2023) ]
Tried latest firmware (9.1.1) last week…
Nvidia is working on updates always so I tried the latest 9.1.1 OS update for my Shield Pro. Unfortunatly Kodi 20.1 Nexus is running a bit better and I had my hopes up, for a little while at least.
After installing my Kodi-build it seemed to run smooth but after a while it started getting jittery and a got a freeze-frame-app for about a minute!? Even after full-debloating and turning of ALL Google background processes it still runs slow as fck.
Sigh, it looks like new hardware is needed on Android 11 (pushing ads and collecting telemetry takes around 35% of capacity, wtf?).
Okay, quickly back to 8.2.3 again 🙂
My device is downgraded and in use for a whole year now and I’m enjoying every minute of it: No more app-crashes, better experience and superfast navigation and also switching between apps runs smooth as …. . It has truely never worked better and I’m amazed with the increase in speed when running on 8.2.3.
But then again, I disabled alot of background services/apps and installed custom home screen this time
My setup
- Nvidia Shield TV Pro 2019
- Android 9 with Nvidia Shield OS 8.2.3 (april 2021)
- Disabled lots of (background-)apps, (guide here)
- [optional] Custom Launcher app, for custom Home screen loader
- [optional] Wolf Launcher, for custom Home screen
- Build RQ1A-210105……….. (january 2021)
- Apps used:
- Kodi 20.1 (+ Custom skin), with addons;
- Plex (client app)
- Youtube app
- Any phone or tablet with “Kodi Remote” or “Kore” for Android.
- Android 9 with Nvidia Shield OS 8.2.3 (april 2021)
- Shield TV remote (latest)
- Logitech MX Master
- Playstation Dual Shock 4

Skip the bullshit and
let me get back my awesome media center!
Why?

I made this page because I needed a complete manual and cheat-sheet for myself anyway and this way it can also be usefull for fixing your device.
This idea started out as a-simple-one-page-cheat-sheet and quickly grew into a couple of weeks with evenings of tumbling down a rabbit hole, eating funny cookies and dining with some wierd animals but in the end managed to made it work better, stronger and faster then ever. We’ve had it along, just didn’t realised it yet…
Now i’m getting a better understanding in the Android (TV) OS and its debugging options, features, inner workings and tools. It took a long time, lot’s of patients to get all required information, tools and software for this little box. Hang in there…
Hope this instruction will help to also fix YOUR Shield TV and bring back the ultra-fast mediastreamer and gameconsole that it can, and should be.
Around december 2021 NVIDIA released a major update for their Shield TV Pro, their very affortable flagship-4K-streaming-device (€ 200,- EUR or $ 222,- USD).

When bought, the Shield TV Pro 2019 was working perfectly! Hooked up to my Samsung 4K OLED TV the device was running Kodi or Plex-app for playing full Blurays and other videos over LAN, seemlessly I might add.
Ever since the update to Android 11 and Shield TV OS 9.0.0 my device had become unworkable and took all the joy out of watching a movie or series.
In my research I noticed that more people are experiencing the same problems…hence this instruction manual.
When bought in early 2020 my Shield TV was working perfectly,
but every since Android 11, NVIDIA Shield OS 9.0.1
it was too running slow and caused many crashes. Also those fckng ads in the home screen 🙁
and also hated the shitty advertising in the home-screen and disabling of third-party-app-support and accessibility to the OS.
Android 11 and Shield OS version 9
As a manufacturer there’s nothing wrong with updating your device to offer new features, apps and services but it seems that the lastest “upgrade” is only good for showing ads and reading your activities.
1. Ads in homescreen, wtf, WTF, WTF???
An all new ad-pushing home screen happily welcomes you to all new Disney and Amazon content, now needly embedded in your home screen. And no way to turn them off, even when removing the apps that the widget promotes. Aaaah. 🙁
2. Background processes
Also with many (re-)newed background processes to keep your active apps stuttering and clattering while google and partners recieve, and get to push and recieve, all kinds of information from and to your device. Stop feeding Rehoboam goddamnit!
3. Telemetry
Telemetry data collecting has also ‘upped the ante’ and google and partners know every event in their little spyboxes.
All in the name of ‘just trying to send you personalized ads’, that you agreed yourself when installing for the first time… you didn’t read? 😆
4. Slowing down device drasticly
With this new update, the device slows down drasticly and creates alot of new errors and crashes in Kodi and Plex-app. So playing your own high-res media has become unworkable and sucks all the joy out of the experience. 🙁
5. Laggy playback and audio sync
Somethimes video would play with the audio out of sync., mostly in Plex-app. Kodi crashes everytime with KodiPlexConnect installed. Also IPTV streams were running slow ‘al of a sudden’ 🙁
6. Audio passthrough?
DTS, DTS-HD MA and EAC3 5.1 and 7.1 surround codecs weren’t playing properly and lagging sometimes. Didn’t look into it…but my surround system did not recognize any codec. 🙁
Overall unworkably slow
After two months of irritation whenever I turned on the device, would watch something for 20 minutes and then again get surprised by a crash, notification or laggy playback and/or navigation and yet another new Disney movie on my screen, no no no no no no no no no no nooooo.
Option A: Solve issues (quit searching/begging for those in may 2022)
I tried every possibility and nothing worked: reset, uninstall (app-)updates and even factory reset (twice, within Android-menu).
NVIDIA Support
Okay, maybe NVIDIA is working on a fix, I thought… there MUST be more shield-users with these problems. So I tried to contact support via mail, facebook, twitter and even filled in a few stupid forms on their websites and forum.
(Still) no response from NVIDIA
After a few weeks of no response I searched the web, yet again. Signed up for NVIDIA SDK and searched ‘within the organisation’ on their pages, social media and forum. Starting to find more and more users there, and on youtube that are experiencing the same problems…finally.
Requested a hotfix @NVIDIA; and got it! I got my hopes up again. NVIDIA rules! 😀
[Update] Downloaded public release / hotfix 9.0.1 and it also didn’t work, still the same issues that I had before in Kodi and Plex-app.
Option B: Smash with hammer
It nearly got up to that point, yeah.
But no worries: I made a proper solution C here
Before this release…
Earlier it all worked like a charm in april of 2021 and it was the best media device I’ve bought in years. Fast hardware with full options, in a little box that consumes little energy and plays ALL 4k HDR formats with ALL audio codecs supported. Jeej.
Downgrade to v8.2.3
After a few long evenings of web searches and some ‘Android-adb-readin-up’ I’ve discovered too many details, directly from NVIDIA SDK with additional information found on several discussion groups social media, forums.and Google Android SDK.
It was a hassle to find the right tools and versions to make it all work. There is sooooo much misinformation or outdated shite out there.
After my own struggle the first time around, I made this proper guide. Along with software downloads with proper drivers.
Hopefully this will ease the process for you.
Hardware checklist
Below a checklist to make sure you got everything you need to complete the job.
- NVIDIA Shield TV (Pro 2019), [current version 9.0.1 (33.1.0.283)]+ Power supply
- HDMIcable, and MUST STAY CONNECTED AT ALL TIMES to;
- Screen or Display (HDMI);
- USB-wired-Keyboard or NVIDIA Game Controller;
- Windows PC or laptop (Win10 Pro x64 Phoenix OS used in this example);
- USB male-to-male-cross-cable (it’s the only way, tried networking: not supported);

Check here how to solder your own with two spare cables.
Or order one here, like this one.
Preparation
To proper downgrade your device, you need to prepare two folders, containing;
- Downloads
for NVIDIA SHIELD TV *PRO* 2019 | ||
---|---|---|
Drivers, for windows (debug + fastboot) ‘extract to c:\driver’ | Download | ~1MB |
Command tools and 8 Images files (Shield OS 8.2.3 images) ‘extract to c:\tool’ | Download | ~840MB |
Check if you got the right device; Shield TV Pro or not.
for NVIDIA SHIELD TV 2019 | ||
---|---|---|
Drivers, for windows (debug + fastboot) ‘extract to c:\driver’ | Download | ~1MB |
Command tools and 8 Images files (Shield OS 8.2.3 images) ‘extract to c:\tool’ | Download | ~606MB |
- Download files above and exctract them in the root of your c:\ drive (or whatever folder you wish)
This will create two folders ‘c:\tool’ and ‘c:\driver’


Enable Developer mode & USB Debug on Shield
Simply enable developer mode in the Android settings on your Shield device
- Settings – > Device settings -> About


- Tap 5x fast on -> Build

Tap on Build 5x fast
this will bring message pop-up with confirmation

Acknowledged!
Now go back one step to
- -> Device settings -> and scroll all the way down to
- -> Developers options

Scroll down and
- Enable -> USB-Debugging

This window will pop-up, we are now ready to connect cables.

Connecting cables
First, two mandatory steps:
HDMI cable must be connected to a screen at all times!
Hotplugging the keyboard not supported (in fastboot mode),
also keep it connected at all times!
- Connect all cables, like so;

When connecting the USB-cross cable Windows 10 should automaticly recognize the device
and should open up a explorer-window with the Shield-shared-folder

if not: install ADB driver manually instructions here.
In my case: ADB Device was auto-installed by Windows but
I had to install the driver for ‘Fastboot-mode’ manually
Command prompt
Now that the NVIDIA Shield is connected and the ‘ADB is recognized’ by windows,
we need to open up a command prompt in administrator mode:
- Press Windows START and type ‘cmd‘,
- right-click on ‘Command prompt’ and choose
- ‘Open as administrator’

- navigate to c:\tool by typing the following command:
cd c:\tool
Let’s connect!
USB Connection check
Now we can check if adb.exe can connect with the device (adb-daemon-service starts automaticly)
- Type command:
adb devices
- Use the remote controller (or keyboard/gamepad) to authorize, select ‘Allow’

- (re)Check if adb.exe is now authorized, by typing in the command window again:
adb devices
Okay, device connected and ready for the next step.
Load Android to ‘Fastboot mode’
Android bootloader on Nvidia Shield TV can be loaded in 3 ways, with command prompt, Nvidia gamecontroller or USB-keyboard.
a. With command prompt
Now that cables and connections are ready, we can reboot to ‘fastboot mode’ by
- Type command:
adb reboot bootloader
b. With Shield Game controller
Reboot to ‘fastboot mode’ is also supported with the NVIDIA game controller
- Unplug power adaptor
- Press and hold A+B buttons
- Plug-in power adaptor
- Release A+B
when fastboot screen is visible

c. with USB-keyboard
Reboot to ‘fastboot mode’ is also supported with a USB keyboard (no hotplug support!)
- Unplug power adaptor
- Press and hold A+B keys
- Plug-in power adaptor
- Keep holding A+B
fastboot screen appears;

Shield will now reboot to ‘Fastboot mode’ and will output the following display:
Congratulations; you are now in ‘fastboot mode’,
continue with a connection check.
Fastboot connection check
Similar to ‘adb.exe’, we now have to switch to ‘fastboot.exe’ and its USB connection. To make sure this works, follow these steps:
- In the command prompt, type:
fastboot devices

If the output is empty, no device is recognized.
This means that the ‘fastboot USB driver’ has to be installed manually.
This was nescesarry in my case: After manual installation, continue to next step
- In the command prompt, (re)type to check the connection (at any time)
fastboot devices

After the ‘fastboot mode’ is connected continue with the OEM unlock
OEM Unlock
Before downloading and flashing the images to the device we have to unlock the bootloader.
- Select ‘Unlock bootloader’
- with keyboard press ‘ENTER’ or gamepad ‘A’

- Select ‘Confirm’
- with keyboard press ‘ENTER’ or gamepad ‘A’

Bootloader is now unlocked! Continue with flashing the images…
Flash images
Once the devices’ OEM is unlocked, we can proceed with
flashing the bootloader and Android- and NVIDIA-OS images.
This will only work if the Fastboot connection check was succesful
- Switch back to the command prompt again and type/copy the following commands;
Rule by rule, in this order (!important)
fastboot flash staging blob
fastboot flash boot boot.img
fastboot flash recovery recovery.img
fastboot flash dtb mdarcy.dtb.img
fastboot flash system system.img
fastboot flash vendor vendor.img
fastboot flash vbmeta vbmeta.img

On the ‘fastboot screen’ progress is also shown;

After putting in all commands and
therefore all the images are stored on the Shield device we can lock OEM again.
If this step FAILS the Shield logo will appear
and device keeps rebooting over and over untill infinity (and beyond)
Repeat the commands above again and check if every rule is [OKAY] in the prompt window,
and/or check for errors in previous steps.
OEM Lock
After flashing all images to Shield device, we can lock OEM again.
This will erase all data on your device!
- Select ‘Lock bootloader’ with keyboard or gamepad
- Select ‘Confirm’ with the keyboard/gamepad
Now the Shield device is ready to load ’the old OS’ again, next step is reboot.
Reboot
Now that all work is done, it’s time to reboot the device back to april 2021 🙂
- Choose ‘Reboot’ in the ‘fastboot screen’

The device will now reboot to the desired OS
Be patient, the first time takes longer to boot (for me 2 minutes)
After rebooting, the Shield device will startup the initial setup wizard.
- Complete the initial wizard, like usual.
- You can now check your version in -> Settings -> Device settings -> About
Downgrading is now done, disable auto-upgrades in the next step
Disable updates
Once the downgrade, reboot and the initial wizard is complete the device is ready to use,
however Android TV OS is by default set to upgrade to the latest OS version,
wich we try to avoid in this case.
- Go to -> Settings -> Device Settings -> About -> System upgrade
- And DISABLE the ‘Auto-upgrade‘ option.
- Next the ‘Check for upgrade’ option
- And choose ‘When upgrade is available’ option

- And choose ‘Notify me’

This way auto-upgrades are denied en no download takes place in background,
wich otherwise would have reduced storage capacity by around 900MB!
ADB USB connection troubleshooting
It’s important to know that there are two types of connection:
Install USB Drivers (manually)
If the USB device is not recognized. follow steps below.
- Open Windows explorer and right-click on ’this computer’ and choose ‘Manage’

This will bring up the ‘Manage computer window’,
- go to ‘Devices’ and unfold ‘USB devices’.
This should contain ‘ADB Interface‘ or ‘Fastboot device‘
(depending on the mode the Shield is in)
ADB Device driver
If the Shield device is in ‘normal mode’ and connected to USB, Windows will display the device as ‘ADB Interface’ and in my case auto-installed the right drivers. If not:
- Right-click here and choose ‘Update drivers’

- In the next window, choose Search on my computer.

- In the next window, choose ‘Choose manually’

- Choose ‘Select file’

- Again, choose ‘Browse’

- And now select the right file (depending on wich driver you want to install)
For ‘ADB Device‘ select file | c:\driver\android_winusb.inf |
You can now command your Shield to go into ‘fastboot mode’
Fastboot device driver
If the Shield device is rebooted in ‘ fastboot mode’ and connected to USB,
Windows will display the device as ‘Fastboot’ in ‘Other devices’
- Right-click here and choose ‘Update drivers’

- In the next window, choose Search on my computer.

- In the next window, choose ‘Choose manually’

- Choose ‘Android devices’ or ‘All devices’ and hit next

- Choose ‘Browse’

- Choose ‘Browse’ again (sigh)

- Navigate to c:\windows\driver\ and choose file ‘android_winusb.inf’

- Hit ‘OK‘

- Hit ‘Next’ and ‘Yes’ to the warning
Windows will install drivers now and reports with this window
- Hit ‘Close’
We can now see that Windows recognizes the device with propers drivers for its connection!
- You can now (re-) check ‘fastboot mode’ here.